
Typing on a dusty, grimy keyboard is no fun, and it’s a safe bet that many people’s keyboards are just begging to be cleaned. Aside from looking bad, particles that build up on and between your keys can accumulate underneath them too. This can interfere with the function of your keyboard — a problem that’s totally preventable with the proper care.
If you haven’t cleaned up in a while, your keys could be harboring all sorts of bacteria and other germs, too. But before you throw your keyboard directly into the garbage, stop and check out our tips and techniques for giving it a proper cleaning.
Over the course of this guide, we’ll give you the step-by-step on some crucial keyboard maintenance. To be specific, we’ll cover using a can of compressed gas to spray away dust and a cloth to clean off surface dust and grime, as well as some tips for wiping between and under your keys. And then we’ll wrap up with preemptive steps you can take, like washing your hands.
Blasting out dust
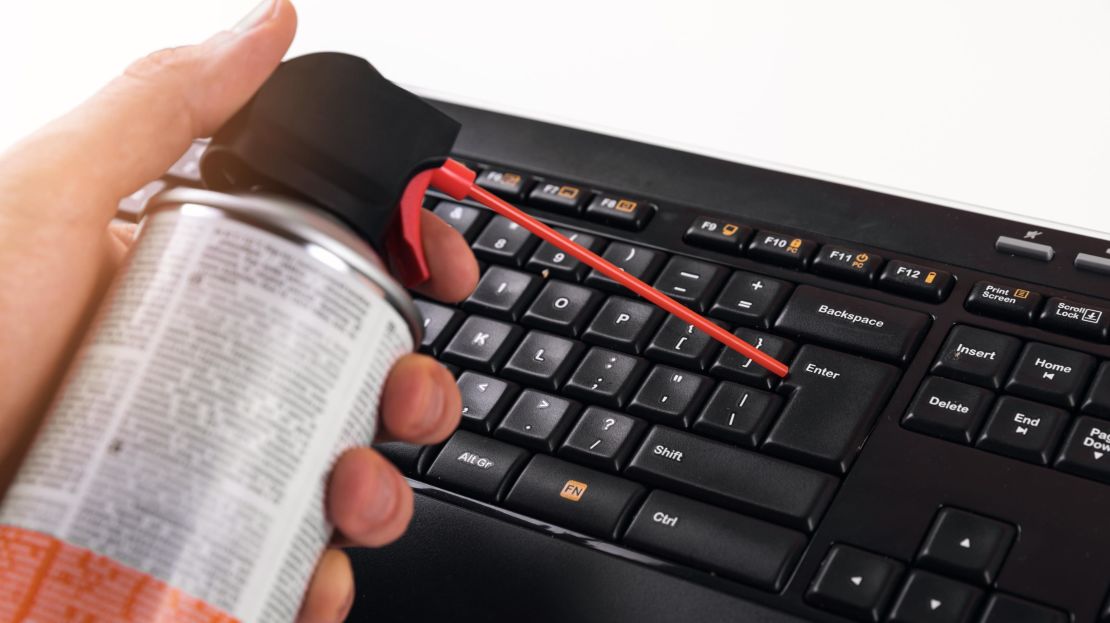
A good place to start with keyboard cleaning is blasting away dust with a can of compressed gas. It’s widely available, but if you haven’t heard of it, try out this 4-pack of Falcon Dust-Off on Amazon ($16.99; amazon.com). This product is a container of compressed gas, so don’t heat it up, shake it excessively or rupture the can. Also, be sure you’re holding it upright while you use it, and try to spray it in short bursts.
To start things off, unplug your keyboard and take it somewhere that is, preferably, well ventilated. It’s crazy how much dust can fly out from your keys sometimes. Next, attach the included red tube to the nozzle of the can for more precision. Stand your keyboard up on its left or right end and point the hose at the gap between rows of keys. In a short burst of up to three seconds, or several quick ones, spray along the crevice. Do this with each row between the keys.
Next, stand your keyboard up on the top or bottom so you can cover the shorter spaces between individual keys. It helps to be methodical about this so you can be sure you’ve covered every area. Apply more bursts throughout as needed.
After extended use, the can might get cold or even develop frost. Don’t worry, this is normal. Just give it a minute or two to return to normal temperature so it’ll be more effective. If you aren’t holding the can upright, it’ll get cold much faster.
Wiping off the keys

Now that you’ve blasted free some dust and particles, it’s time to clean up the surface of your keys. For this process, we (and companies like Apple) recommend using a soft, lint-free cloth. You’ll get the best results from a microfiber cloth, designed to pick up dust, smudges and other buildup. You can’t go wrong with this 24-pack of AmazonBasics Microfiber Cleaning Cloths ($14.30; amazon.com). Our tech editor, Jacob Krol, swears by them. But if you don’t want to fill your desk with cloths, this package of Eco-Fused Microfiber Cleaning Cloths contains just five ($8.99, originally $9.49; amazon.com).
When it comes to wiping down your keyboard, all you have to do is gently wipe in one direction. You don’t have to press hard; the cloth will do most of the work. If you’re looking for a little more cleaning power, you could slightly dampen the cloth with water or isopropyl alcohol, the latter of which can help remove germs (on cleaned surfaces, a solution with at least 70% alcohol can help disinfect, as well). Emphasis on “slightly,” though, as you don’t want any excess liquid to drip into the hardware.
Just be careful with abrasive alcohol wipes, as they could stain the plastic or wear the lettering on your keyboard in rare cases. If you’re looking for a good product for this, we recommend the ammonia-free iCloth Lens and Screen Cleaner wipes ($24.89; amazon.com). The kit comes with 100 individually wrapped wipes, and they’re great for keyboards and other delicate surfaces, not just lenses and screens.
Getting a deeper clean

We’ve found that one of the best things for cleaning between keys is a cotton swab. You likely have some already, but if not, brands like Q-tips are available on Amazon ($9.59, originally $14.89; amazon.com). Once you’ve got your swab, wipe between the keys from one side to the other. You’ll probably need to swap swabs as you wipe up buildup. Do your best to wipe up the mess rather than bulldozing it under the next key. You can alternate between wiping and spraying with the can of gas for a more thorough job.
If intense grime remains, you could very lightly dampen the swabs with isopropyl alcohol. Just be careful not to get any liquid into your keyboard. A toothbrush or makeup brush can also be effective at scrubbing away buildup, as long as you don’t scratch your keys.
Finally, for the more dexterous of you out there, you can remove the keys from the keyboard. This should only be done if the manufacturer of your keyboard states that the keys are removable. You will need to find instructions, depending on the keyboard, but this is a good measure to prevent possible obstruction of your keys, or if you’re sure something’s already blocking it.
Preventive care

Dust, grime and germs are an inevitable part of the tech world. But there are things you can do to slow the buildup. One is simply washing your hands before you sit down for a session at the keyboard. This will not only reduce grease and particles, but you won’t be spreading nearly as many germs to the surfaces of your keys. And, though it may go without saying, don’t eat or drink too close to your keyboard. And if you do, wipe those cheese crumbs off your fingers before you type — you animal!
Check back here from time to time as we keep this guide up to date. Don’t let your keyboard languish in filth — clean it up to make it look classier and last longer.
Note: The prices above reflect the retailer’s listed prices at the time of publication.


