KitchenAid attachment quick picks
Best KitchenAid attachment for fresh pasta from scratch: KitchenAid 3-Piece Pasta Roller and Cutter Set
Best KitchenAid attachment for creamy concretes: KitchenAid Ice Cream Maker Attachment
Best KitchenAid attachment for grating cheese and more: KitchenAid Fresh Prep Slicer/Shredder Attachment
The best KitchenAid attachments transform the baking titan on your counter into a professional-grade kitchen with a single appliance. I’ve tested some of the most popular add-ons for the best stand mixer over several weeks, and they’ve made my home feel like an Italian restaurant, a butcher shop and a roadside ice cream stand all in the same day.
But which KitchenAid attachments are truly worth it? The mixer itself comes at no small cost, and though we think it lives up to the hype for its baking prowess alone, doubling down on extras only ups the financial commitment. While it may often be more economical to consider a standalone gadget that’s cheaper, there’s value in avoiding another machine that’s just going to hog space. I found myself using these accessories again and again because the force behind them was already the king of my counter.
Be warned: There are knockoffs out there. KitchenAid lists 38 attachments on its site, many of which are variants of the same bowl, paddle or whisk. Those are useful too, but we’re narrowing our search even further to the accessories that do more than just mixing. Some remove the hassle of an otherwise manual task, while others unlock culinary avenues I’d never have gone down on my own. My top choice falls into the latter category.

Available in dozens of colors that will look great on any countertop, our top stand mixer is a kitchen staple that opens up all sorts of possibilities with its range of attachments.

If making fresh pasta from scratch feels intimidating, fear not. All you need are some eggs and a little flour and this stainless steel magician will do the rest.
Best KitchenAid attachment: KitchenAid 3-Piece Pasta Roller and Cutter Set

Making pasta entails three main steps: forming the dough, rolling it flat, then cutting it into your desired shape, like spaghetti. It can all be done by hand, but KitchenAid’s roller and cutter attachments simplify that process to an extent that feels like cheating.
I tried to be a hero and form my dough by hand, slowly incorporating flour into eggs until a firm ball came together. You can also use your stand mixer — that’s literally its primary purpose — and the dough hook included with most models.


Making pasta dough.
Then comes what would be the hard part without machinery. Rolling dough flat can take time because it has a puffy rebound to it. You could use a pin roller, or you could save your muscles and screw the KitchenAid pasta roller into the attachment hub and repeatedly guide your dough through the device. It’s quick, easy and oh so satisfying. To gradually flatten the dough, adjust the dial on the front of the roller from one to eight, depending on how thin you want it. This newcomer appreciated that KitchenAid included suggestions for how thin certain pasta shapes should be.
Once you have a long, flat sheet of dough, swap out the roller for any of KitchenAid’s pasta cutters. The amount of time saved by these is invaluable. Slicing thin strands of spaghetti would take focus, precision and steady hands I just don’t have. With the attachment, feeding the flat dough through the blades takes about five seconds … and I’m not exaggerating.
One note is that when rolling and cutting, coat your dough with plenty of flour to make sure it doesn’t get stuck. Don’t submerge the attachment pieces in water or run them through the dishwasher to clean either. Use the included brush for stubborn pieces stuck inside, and take each component apart for more thorough maintenance. These instructions didn’t give me any trouble during testing, but it’s important to follow them to keep the stainless steel in working condition.
I tested the spaghetti and fettuccine variants that came in a three-piece set with the roller. KitchenAid sells five-piece sets that include lasagne and capellini cutters, which are also available in a separate bundle. Or you could just get the roller. Or make small shapes like rigatoni and macaroni with the gourmet pasta press attachment.

If it feels like an endless rabbit hole, it kind of is. The major downside of making pasta with the KitchenAid attachments is that going all in would sting to the tune of $520 when shopping at full price (and that’s not including the mixer itself). If you’re really into making homemade pasta, then it’s a worthwhile investment. But if you’re only casually interested, maybe don’t spring for the entire set right away.
KitchenAid also offers plenty of guidance on how to store the pasta if you want to make a batch for another day. Just make sure it’s completely dry before stashing. I’d argue, though, that cooking and eating as soon as the pasta is cut is the way to go. The process is enjoyable and abbreviated enough that it could be done while preparing a full meal — I made mine as meatballs simmered and chicken baked — on any night without intense prep. But the result is the most rewarding part. The pasta is darn good.
How we tested
Since comparing the different attachments is somewhat of an apples-to-oranges exercise, we evaluated each according to a series of universal points.
Use
- Setup and prep: Our testing was the first time we used any of these attachments, so we assessed how easy they were to install and learn how to use.
- Performance: Simply, how well did each attachment do what it claimed to do? We judged the process and product while experimenting with the different features and capabilities of each attachment.
- Cleaning and maintenance: We accounted for the care instructions each attachment came with, including which pieces were dishwasher-safe. We also noted any durability concerns.
Utility
- Convenience: Did the attachment make a kitchen task markedly easier?
- Frequency: How often would the average person use a particular attachment?
- Novelty: Is there anything that attachment does that is unique? Does it offer anything a standalone model in that category lacks?
Other KitchenAid attachments we tested

If you can plan ahead and freeze the mixing bowl overnight, the KitchenAid ice cream maker attachment is suppressed, speedy and simple. Its no-lid setup is perfect for mix-ins.
Ice cream makers usually fall into two categories: compressor models with cooling systems built in and frozen bowl models that require several hours of chilling. The KitchenAid ice cream maker is in the latter, though a few standout features make it a compelling option compared to some of our top picks.
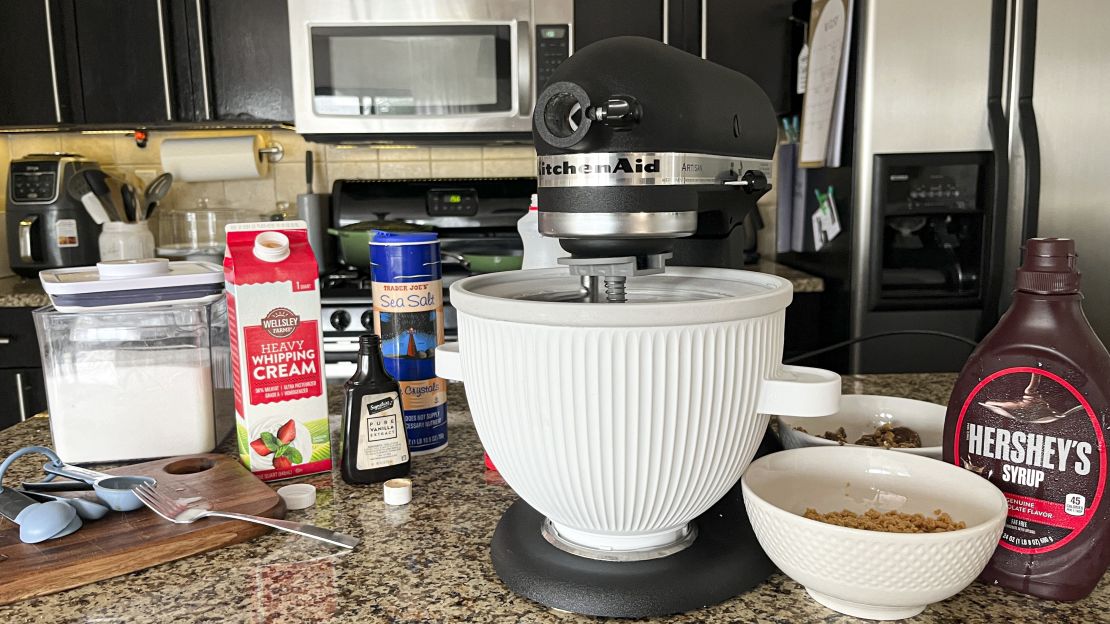
Preparation is standard with the KitchenAid ice cream maker attachment. Put the empty mixing bowl in the freezer overnight. KitchenAid suggests 16 hours minimum; I chilled mine for closer to 24. Prepare your ice cream base however you’d like. (I prefer to not use eggs because it leaves more room for error.) Once both are ready, clamp the bowl onto your mixer, put the dasher into the bowl, connect it to the mixing shaft and turn on the machine. Nothing complicated — just ensure it’s on before you pour in the ice cream base.
The rest is as simple as it gets. The whirring motor of the mixer is not as loud as other ice cream makers we love enough to tolerate. The dasher fits perfectly into the bowl, ensuring no buildup along the bowl’s walls. Churning takes about 20 minutes, which is only five minutes longer than our favorite ice cream maker, the $70 Cuisinart ICE-21. You’re paying more for the KitchenAid attachment ($100 at full price), but the saved counter/cabinet space and swift cleanup are worth it.
My favorite part about the KitchenAid ice cream maker attachment comes just as the ice cream is almost done churning. Because the bowl has no lid, any mix-ins are fair game. For my latest batch, I went with chopped peanuts, chocolate chips, crushed Reese’s and chocolate syrup. I had an incredible concrete without going to Dairy Queen. It ruled.


Is making ice cream something you’ll do every week? If yes, this is a no-brainer. If not, you may get more use out of the attachments that replace basic kitchen tasks instead of expanding your appliance arsenal.

Convenience is turned up to full blast with this tool that will make kitchen prep comically easy. You’ll never buy shredded cheese again.
If the idea of a $60 cheese grater sounds ridiculous, please just try this once. I shredded a block of cheddar cheese and two potatoes in about a minute and hardly had to move. Consider the alternative: rubbing a hunk of cheddar back and forth on a metal grater that lacerates knuckles and clogs after a few swipes.
I salivate at all the foods this thing is going to save me time and effort on. Tacos, pizza, pasta, dips and way more can now include fresh cheese that is worlds better than the pre-shredded stuff you’ll get in the dairy aisle.
Even if cheese isn’t on the menu, the slicer/shredder can give back minutes in bunches during different ingredient prep. With three included blade sizes, shredding potatoes for hash browns or slicing veggies for a salad or slaw could not be more straightforward. Cut them to a size that will fit into the top tube, drop them in, then stuff them down with the included pusher. Don’t forget a bowl to catch everything.
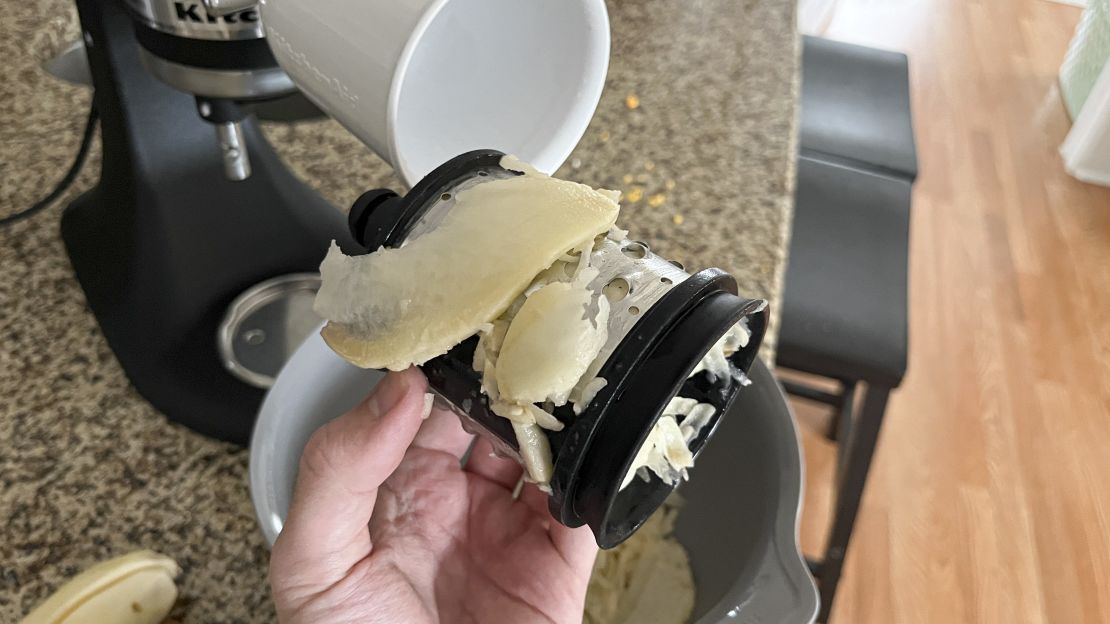
The only drawback is the slicer/shredder leaves a few scraps stuck between the blade and the main attachment housing. Pop out the blade with the release lever and you can chop those pieces yourself or try to send them through again. Once that’s done, every piece of the attachment except for the main housing can go through the dishwasher.

Grill masters experimenting with the perfect burger blend have to try this grinder that makes quick work of meat and more.
Picking up some ground beef from the grocery store will make delicious burgers at home, but why limit yourself? Grinding at home means you can pick the cut of beef or switch it up with a completely different type of meat. Turkey, chicken, veal, pork and more will work. Vegetarian options will grind too, so your veggie burger eaters can join, and the same goes for other hard items. The nuts I put in my ice cream went through the grinder.
I stayed rather ordinary with my testing, grinding chuck steak to use for smash patties and meatballs. The texture was malleable and loose, unlike the tight pack of some store-bought meats. I liked that it came out in small beads instead of long strands. And the final product? Scrumptious.


Actually grinding the meat requires you to put the pieces together correctly. After adding the grinding screw to the main housing, insert the blade with the sharp edges facing out. Then cover it with a grinding plate and the screw-on collar. Once it’s on the stand mixer and turned on, push food through from the loading tray with the included pusher. Using your hands is a dangerous and unnecessary risk.
Cleaning was the only frustration I had while testing the food grinder attachment. Particularly fatty strips of meat got tangled up in the components and required serious scrubbing to pry loose. Much like the slicer/shredder, chunks of meat also never made it through the grinder even after I left it on and stopped sending more through.
Serious carnivores might get better results out of the metal food grinder attachment (I tested the plastic), which also comes with sausage stuffing apparatuses. That said, I pushed meat through with decent oomph and didn’t get the sense that durability was an issue.

Snow cones anyone? This fun attachment has the least utility of those we tested, though it makes a refreshing summer treat in an instant with room for creativity.
The most notable aspect of the shave ice attachment could be seen as a pro or a con. Unlike the snow cone makers you remember from your childhood (I recently bought this one from Target for my young cousins), you can’t just dump a bunch of ice into the attachment and crank. Instead, this machine only works with pucks of ice frozen inside the included molds.
The bad news is shaving a large volume of ice takes a lot of planning. You’ll have to empty and reuse the molds several times (or buy extra) because the set comes with just four. But the positive is you aren’t limited to freezing just water. The attachment comes with a small recipe pamphlet that recommends freezing cereal milk, chai oat milk and cherry juice. There are a ton of possibilities. Though my early testing has included just cherry snow cones (give me some credit; it was a homemade syrup), some frozen cocktails are in my plans.
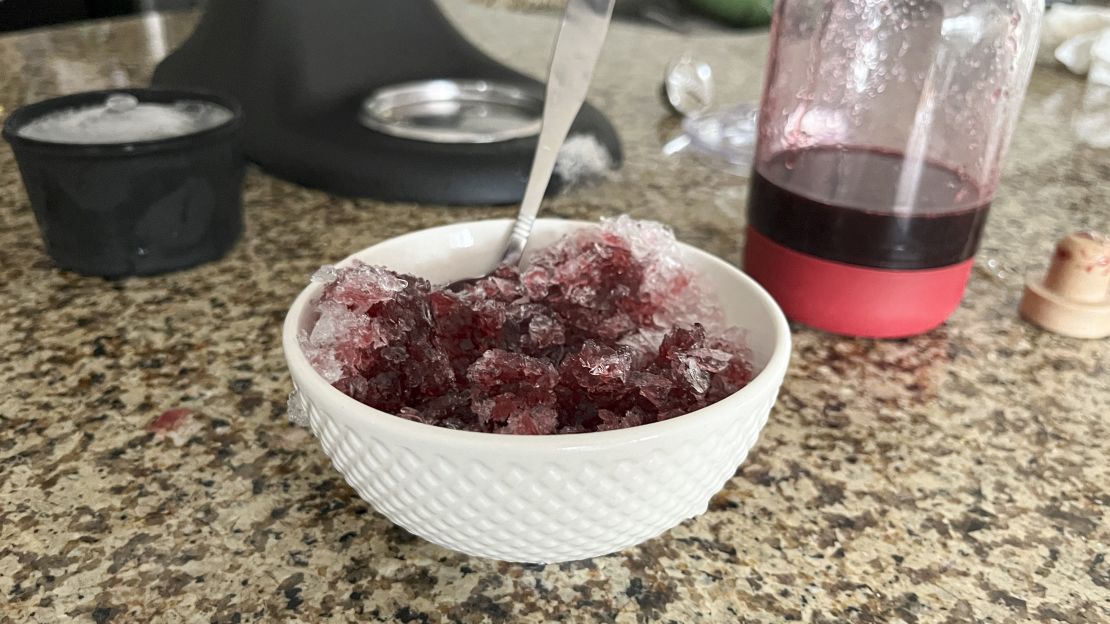
Assembling the various pieces of the ice shaver is a bit cumbersome for starters. It has several parts that need to be aligned exactly right to click into position. But once all is in order, it executes to perfection. One puck made enough ice for at least two people in a matter of seconds. There are two blades, one for coarse, crunchy ice and another that produces a finer, fluffier shave.
KitchenAid attachments we plan to test next

Perhaps some zucchini noodles would pair nicely with all the fresh pasta you'll be making?

Slicing and dicing veggies could become the easiest part of any recipe.

Adding ingredients to a cake mix needs to be precise. This attachment will ensure accuracy and help prevent a mess.