If you like to camp or road trip, then odds are that you’ve struggled at some point to squeeze everything you need (or simply want) into your vehicle before a trip. From coolers and camping gear to blankets and board games, comfortable roadtrips and epic adventures demand a lot of gear, especially if you are packing supplies for a carload full of people.
Even the most spacious truck, van or SUV has its storage limits, which is where cargo carriers come in. My family of six — which includes me, my mother, my sister, her husband and their two kids — has been using a Thule rooftop cargo box on our vacations for five or six years. We have something similar to the Thule Motion XT L, but my sister bought it so long ago that we can’t recall for sure which model it is. We love the additional space it offers, but it can be challenging to put on, fill up, unpack and take off.
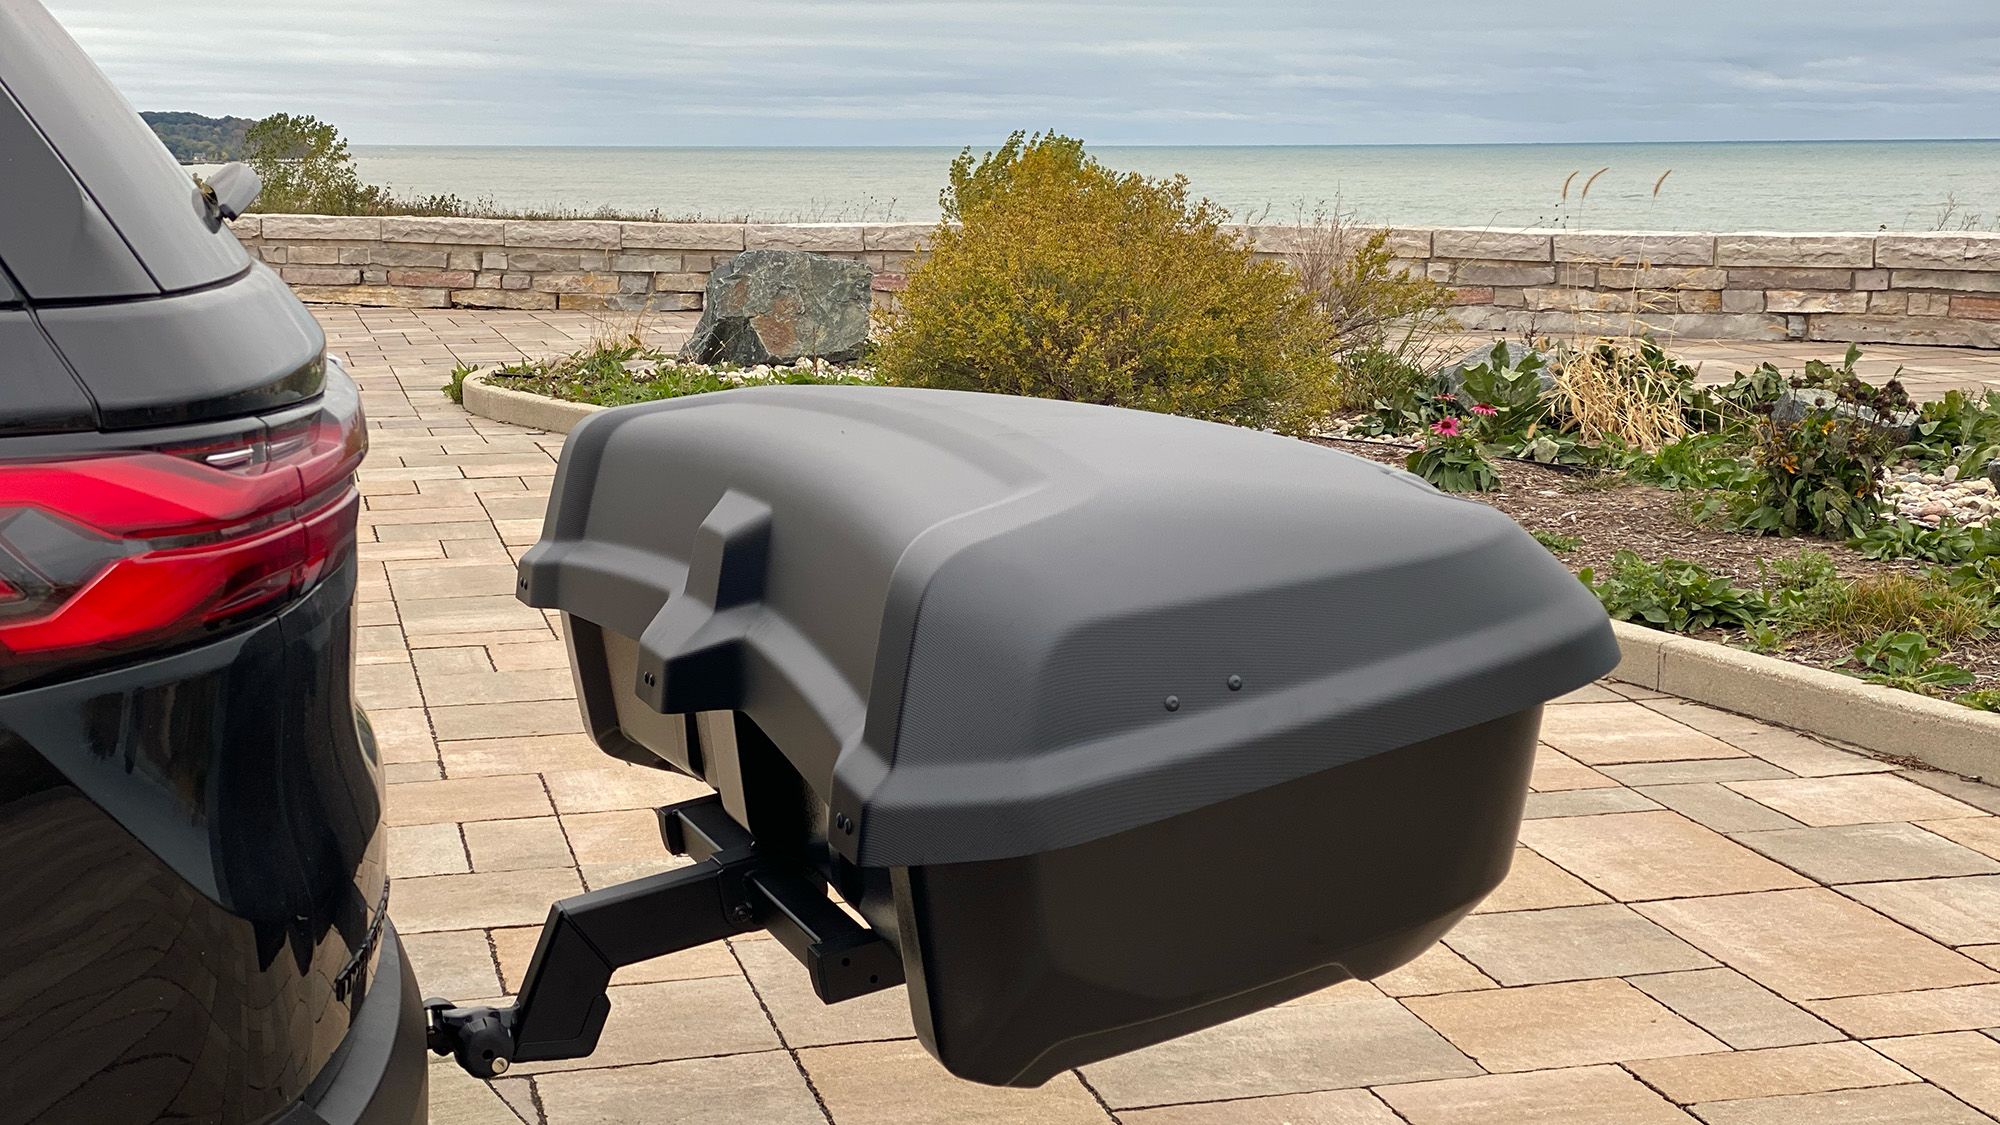
Because our new vehicle, a 2023 Chevy Traverse, came with a built-in hitch, it seemed like the perfect opportunity to test out the Thule Arcos rear cargo box, which attaches to a rear hitch. So, I mounted the cargo box onto the back of our SUV, loaded it up with my family’s gear and drove around Wisconsin this fall to see if it’s worth it.
This is an incredibly lightweight rear cargo box that attaches to a rear hitch and is a breeze to load and unload.?If you’re looking for a useful external storage solution, but you don’t want to put something on your roof and don’t mind the added difficulty while driving in reverse, the Thule Arcos is worth a look.?
What is a cargo carrier?
Cargo carriers come in all shapes and sizes, and each style (and individual model) has its own benefits and drawbacks. The two main styles of cargo carriers are rooftop carriers — including rooftop racks, platforms and boxes, which are usually installed on rooftop crossbars — and rear cargo carriers that attach to a vehicle’s hitch.
In general, roof cargo boxes tend to be more popular and are often larger than rear-attached carriers. Since these boxes sit on your roof, they don’t complicate parking, don’t require you to install a hitch and, if you already have a hitch, a cargo carrier on the roof means you can use the rear hitch to haul everything from bikes to boats.

That said, rooftop carriers also tend to be much more challenging to mount on vehicles (particularly on tall vehicles like SUVs), and they are also harder to fill, unpack and remove from the car. A certain amount of strength, height, flexibility and dexterity is required to do all those things, which can be difficult to impossible for some travelers. Topside racks can also be problematic if you’re trying to enter a garage or drive-through with a low ceiling. Rear cargo racks, on the other hand, are much easier to work with, don’t prevent you from entering low-ceiling spaces and also free up your roof for rooftop tents if that’s your thing.
What we like about it
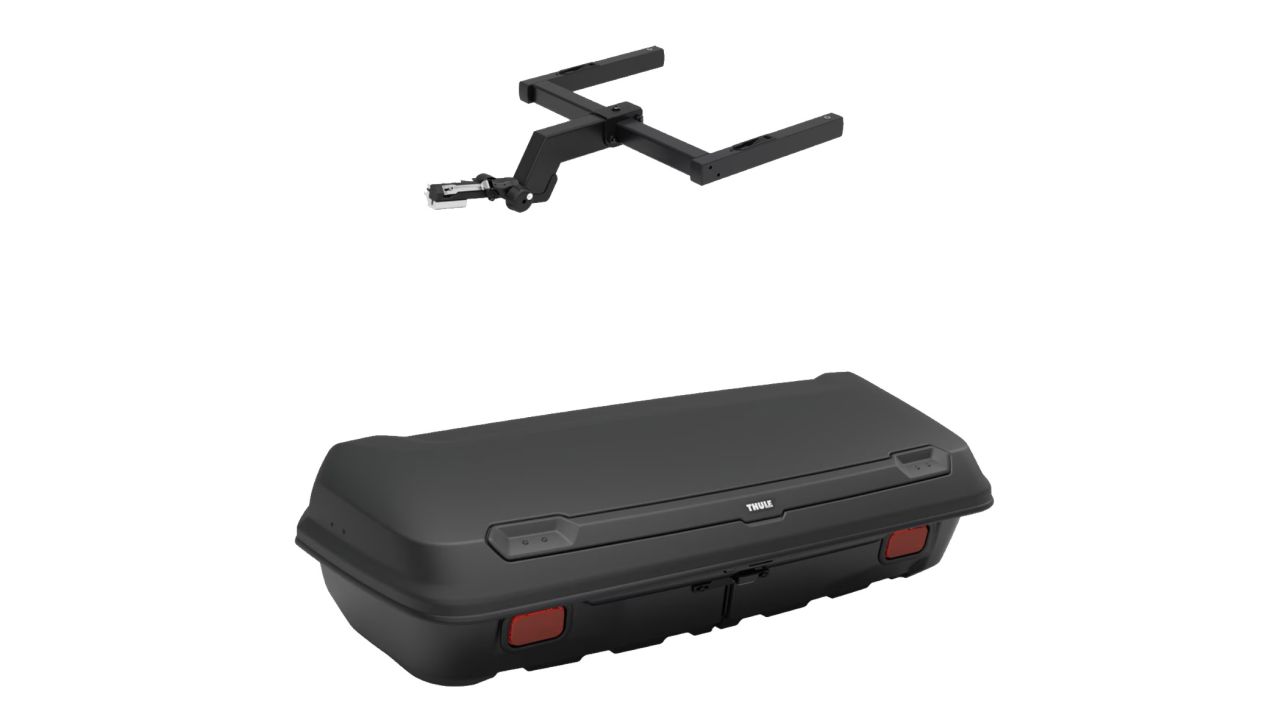
The Thule Arcos is an incredibly lightweight rear cargo box that attaches to a vehicle’s 1.25-inch or 2-inch hitch receiver via the required Thule platform. This hard-sided cargo carrier adds an additional 14 cubic feet of space to your vehicle and can accommodate up to 110 pounds of cargo. According to Thule, it can handle driving speeds up to 80 miles per hour, and it doesn’t negatively affect your miles per gallon (mpg), as is the case with rooftop racks.
Accessible height and plenty of room
What my family loved most about this cargo carrier hands down was how easy it was to use. Having grown accustomed to rooftop carriers, it was refreshingly simple to have everything at waist height. In fact, the rack is so low that even the kids could help load and unload it.

To my surprise, the Thule Arcos is much bigger than it looks. When I initially sized it up, I was worried it wouldn’t accommodate as much as our rooftop carrier, which is longer but not as deep. The Arcos’ 14 cubic feet of storage space, however, could fit a respectable amount of cargo. On our trip, we managed to stuff blankets, random packing cubes, books, board games, puzzles and snacks along with dolls and games for my niece in the cargo box … and it was still only half full.
Despite being so large, the Thule Arcos is surprisingly light at 43 pounds. However, because it’s so wide, we recommend installing and removing it with a second person so you don’t wind up dropping and dragging it around.
Quick setup and use
Though Thule’s instructional manual was lacking, which resulted in me wasting a lot of time fussing and flipping around screws (more on that later), once I determined the issues and workarounds, setup was decently straightforward. Though it’s definitely possible to install this rack on your own, it is easier having another person help you. The extra set of eyes and hands can make understanding the instructions, navigating the box’s position and pointing a flashlight at some hard-to-see holes much easier.
The initial setup of the platform is what takes the most time, but you only have to do that once. If you experience no challenges, this setup might take ten minutes, but if the directions seem unclear to you (as they did to me), this might take an hour. Once the platform is set up, though, you can easily slide it on and off the hitch every time you use it, and you can quickly place the cargo box on and off it. It takes less than two minutes to get the assembled platform rack and cargo box on and off the vehicle, which means it’s easy to just throw on whenever you need some extra storage.
Car-friendly features
Depending on the model of your car, it’s possible that this carrier (or any rear cargo carrier, for that matter) could block the car’s taillights. However, the Thule Arcos has an integrated light feature (via a four-pin plug) to connect the lights on the cargo carrier to your car’s brake lights. If your car has a seven-pin hookup (as ours does), you’ll need a seven-pin to four-pin trailer adapter, which you can pick up at your local hardware or automotive store. This way, when you hit the brakes, the lights on the cargo carrier light up.

Should you need a bit more space between the carrier and your trunk, you can also get the optional two-position hitch extender, which adds an extra 7 to 9 inches of space. While you could certainly get by without the extender, depending on the model of your truck or car, you may not be able to open the trunk without first removing the Arcos rack, which is annoying if you want to just pop in to grab something quickly. According to Thule, most vehicles will not need a hitch extender to access the trunk, but it was necessary for our Chevy Traverse SUV, as the trunk bumped into the box without it.
As with other cargo racks and bike racks, I wondered how easy it would be to steal the rack. While I’m sure a dedicated cargo box thief could certainly find a way to make off with it in the middle of the night, I can’t imagine they could do so without severely damaging the box to the point that it would no longer be useful to them. To get the cargo carrier off the platform rack, you need first to unscrew the screws that are inside the carrier. However, without the key that opens the cargo box, you can’t access the interior or the screws required to remove it in the first place.
What we didn’t like about it
Unclear instructions and confusing assembly
Probably the most frustrating aspect of the Thule Arcos was its instruction manual. I found it to be unclear and lacking sufficient description. Like many companies, Thule is trying to completely eliminate words from its instructions and only use pictures to convey what you’re supposed to do. Theoretically, this strategy would allow users worldwide to use the same picture-based manual regardless of their language. However, I just don’t think the pictures did a good enough job explaining what to do.

In several instances, I was so stuck that I had to search for instructional videos on YouTube. To make it worse, Thule doesn’t even have its own instructional video (which they could easily create and link to via a QR code in the manual), so I found myself scrolling through various videos of some internet guy installing the box instead (like this video). Even though those videos were helpful, they didn’t necessarily highlight the particular challenges I encountered or identify some of the parts and steps. Why? Because they only showed a quick, seamless assembly instead of explaining potential challenges, points of confusion and workarounds.
Lack of light adapter and hitch extender requirements
Another major oversight by Thule is its failure to dig into why or when a user would require the hitch extender or trailer light adapter. The Thule Hitch Extender is sold separately, but for some reason, it’s not mentioned anywhere on the main Arcos box product page or the Arcos platform page. Thule automatically sent me the extender when I got the box to review, but the average consumer may not think to order a hitch extender since there’s no way for you to check if you’ll need it beforehand. And if you figure out you do need an extender, you might have difficulty finding it on the Thule website, not to mention it’s another $80 on top of an already expensive investment.
Thule also fails to mention anywhere on its website or in the instruction manual that the Thule Arcos uses a four-pin plug to connect your car’s lights to the box and that if you have a seven-pin connection port, you’ll need the previously mentioned trailer adapter. These adapters are cheap and easy to come by, but unless you have existing knowledge of trailer light hookups, it can be an easy thing to miss.
Added bulk and length to your car
My family and I loved the Thule Arcos cargo carrier, but there is no denying that having a big hunk of plastic (or metal, or fiberglass) on the back of your vehicle complicates parking, backing up and moving around in tight corners. The same goes for trying to get in and out of crowded parking lots and gas stations, but if you allow additional space, it’s doable. I would compare the experience to driving with bikes on the back of your car: Yes, parking is more complicated, but after a while, you get used to the new, larger size of the vehicle and you adjust to it.

Because I prefer to back into our driveway after a trip to make it easier to unload the trunk and, in this case, the rear cargo rack, I was initially worried about backing into the obstacle course of our driveway, complete with another car, overgrown shrubs and a line of garbage, recycling and compost bins, along with a slew of the kids’ bikes and toys. As it turned out, backing into the crowded driveway went very smoothly (and certainly was easier than parallel parking), though if you’re used to relying on backup cameras, you might need to practice using your mirrors a bit before you feel entirely confident.

I also appreciated that even though the cargo box blocked much of the rear camera’s view (which was expected), I could still see the sides of the landscape. This surprised me, as I was expecting absolutely everything behind the car to be blocked. However, the obstructed view still allowed me to see quite a bit, including the lines demarcating the sides of parking spaces and also the rear curb. I could not, however, see anything immediately behind the cargo rack, so you’ll want to be extra alert of kids or animals who may be running around when you’re parking.
How it compares
The Thule Arcos is a newcomer to the rear cargo rack market, and while its box style isn’t unique, there aren’t a ton of other options, especially with a trustworthy name like Thule behind it. The Yakima Exo GearLocker is one of its closest competitors with a capacity of 10 cubic feet (versus the Arcos’ 14 cubic feet), but it’s roughly half the price and allows you to place additional cargo boxes and bike racks above it.
When thinking of other rear cargo racks, you’re probably picturing an open basket that gives you a bit more storage space like this one. While these are definitely cheaper than the Thule Arcos, your gear isn’t safe from the elements, or even passersby in the parking lot.
Bottom line
It’s undeniable that cargo carriers make it easier to bring everything you need for an epic adventure, and there is no single perfect cargo carrier. That said, I love the Thule Arcos for a bunch of reasons, mainly how large, sturdy and easy it is to use. It’s a breeze to fill and unpack, and it’s low enough that kids or people with limited mobility can access it. It’s perfect if you don’t have crossbars on your car, if you don’t want to bother with rooftop carriers or if you want to use your roof for another purpose, such as installing a rooftop tent. However, if you are very hesitant to drive or park with something on your rear hitch, or if you also like to travel with bicycles on your hitch, then the Thule Arcos — or any rear hitch cargo carrier, for that matter — might not be the best fit.